
Blog
Spring Activity: Step-by-Step Guide to Painting Rocks


Whether you want to decorate your garden, add a crafty touch to your home decor, organize a (safe) activity with friends, or simply put your artistic skills to the test, we’ve got just the thing for you and your kiddos: painting rocks. This classic craft activity is easy-peasy to do and comes with tons of fun!
What you’ll need:
- Smooth, dense and flat rocks! You can search for them during a walk in the park or get them at craft stores, home improvement centers, or landscaping businesses.
- Acrylic paint, paint pens, and/or permanent markers
- Thin and large brushes
- Sealer
- Primer (optional)

Next steps:
- Once you have your rocks, the first step is to give them a good wash and wait for them to fully dry.
- If you want to make your colors really pop, you can paint the rocks with a primer before applying your personal design.
- Get creative! Use acrylic paint, paint pens, and permanent markers to make your mini rock-sterpieces come to life. (Tip: if you’re painting the whole rock – using primer or paint – we recommend doing a couple of coats for the best results!)
- Let the paint dry before applying each new layer of your design. Trust us – it’s worth the wait!
- When the design is complete, apply a spray sealer to protect it.
- You’re done!

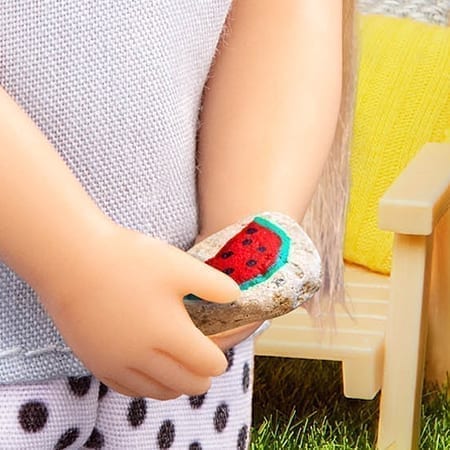
There are infinite options in terms of what kids can paint on their rocks! It can be anything from cute animals to colorful hearts, or from fruits and veggies to quirky patterns. Together with going wherever their imaginations take them, we suggest creating additional painted rocks with inspirational messages of your choice – and adding a little twist to the activity.
Instead of keeping those rocks, we recommend leaving them somewhere in your neighborhood or a local park. This small act of kindness is sure to put a smile on the face of the person who finds them!
Is your family diving into arts and crafts this season? Share your creations by tagging us @loridolls!


